BACKGROUND:
The chance that an organism will be preserved as a fossil is low.
Geological processes such as erosion, weathering, sedimentation, and
leaching constantly "attack" the fossil, which may destroy it
before anyone sees it.
There are two main types of fossil preservation, with
alteration and without alteration. Most common is fossil
preservation with alteration; the original organic material is partially to
fully changed into new material.
There are several types of preservation
with alteration:
- carbonization, a chemical reaction where water transforms the organic
material of plant or animal to a thin film of carbon. Nitrogen,
hydrogen, and oxygen are driven off as gases, leaving an outline of the
organism. Organisms often preserved by carbonization include fish,
leaves and the woody tissues of plants.
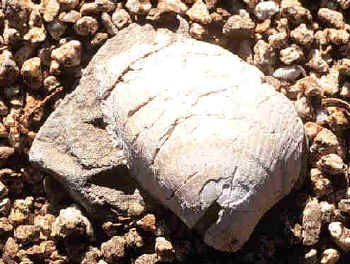
- permineralization or petrifaction takes place in porous materials such
as bones, plants and shells. The material is buried; later, groundwater
percolates through its pore spaces. A solution, commonly supersaturated
in either calcium carbonate or silica, precipitates minerals in the
spaces. The original wood or shell like material preserved.
- recrystallization changes the internal physical structure of a fossil.
Recrystallization changes the microstructure of the original minerals;
they often reform as larger crystals. The composition of the mineral
does not change, only the crystal structure. For example, many shells
originally composed of calcium carbonate in the form of the mineral
aragonite recrystallize into the more stable form of calcium carbonate
called calcite.
- replacement involves the complete removal of original hard parts by
solution and deposition of a new mineral in its place. The Petrified
Forest in Arizona is an excellent example of this type of preservation.
Here the original organic material (wood) has been wholly replaced by
silica.
The second type of fossil creation is without alteration
or direct preservation. The most common directly
preserved fossils are unaltered hard parts of a living organism, like
shells, teeth, and bones. This material is unchanged, except for the removal
of less stable organic matter. Other examples of this type of preservation
include fossil corals, shells, sponges, microscopic fossils and a host of
other organisms with hard parts. In rare circumstances, preservation of the
soft parts of an organism may occur.
Paleontologists can also study past life using indirect evidence about
how the organisms lived. Types of indirect evidence include molds and casts,
tracks and trails, burrows and borings, and coprolites.
The formation of a mold and cast is a very common type of indirect
preservation. After the remains of an organism have been buried and cemented
within sediment, water percolating through the sediment leaches out the
fossil. This leaves a cavity in the rock, called a mold. A cast then forms
when the mold is filled up with another substance. In some cases minerals
such as calcite or quartz precipitate in the mold; elsewhere loose sediment
may fill it up. The formation of a cast is similar to putting jello in a
mold; when you remove the mold, you are seeing the cast of the mold.
The other types of indirect evidence are collectively called
trace fossils. A trace fossil gives a paleontologist some evidence of the organism’s
behavior. There are three main types of trace fossils. Tracks and trails are
produced by an organism walking, crawling, foraging, or resting. For
example, dinosaur tracks provide information about how large the dinosaur
was, how fast it walked, and whether it walked alone or in a group. Burrows
and borings are the tunnels or burrows left by organism digging into the
ground, either on land or underwater. This may indicate whether the animal
was feeding, dwelling, or just foraging. Finally, coprolites are fossilized
animal excrements. They give some indication of the structure of the animal’s
gut, and sometimes provide clues to its diet.
PROCEDURE:
- In this lab the students prove that the "present is the key to
the past" by using the remains of present day living organisms to
make their own fossils. They will simulate the formation of mold and
cast fossils. They can make 5 different fossils (depending on
time) including gastropod, scallop, clam, mushroom coral, and stone
coral.
This lab can be extended by having each student group construct a
"mini" analysis of their fossils. Have the students point out
features such as the quality of fossil preservation, features that may
have fossilized well or not at all, or any other observations or
conclusions that you assign or that they discover.
A short version of this lab is to prepare the molds and casts in
advance, and have the students try and determine which impression
belongs to which shell.
Before lab, prepare the materials for each student group. If you have
not made mold and cast "fossils" before, you may wish to
practice before working with the plaster of Paris.
- Explain the principles of fossilization to the students. Be sure to
describe the formation of mold and cast fossils. Tell the students they
will make examples of molds and casts in the lab. Emphasize to the
students that not all the information about an organism can be recorded
in a fossil. Not all objects fossilize well. For example, objects with
soft parts (like leaves) do not make good molds. Also, objects like
gastropods (which are detailed inside the shell) only represent the
outside, which can be misleading to whomever finds the fossil.
Paleontologists sometimes have to act like detectives to trace what the
organisms originally looked like. Sometimes they never find out!
- Each student group should make a mold and cast of a different type of
fossil. If you have enough plaster of Paris, have the students make
individual fossils. Use the instructions below to guide students in
making fossil impressions.
- Flatten a piece of plasticine or modeling clay. This will be the
base for making the mold and cast, so make sure the flattened clay
is wider than the object to be "fossilized." To help guide
your students (this is optional, but recommended), make a ring from
a strip of thick paper. The diameter of the ring should be greater
than the width of the object. Tape the ends of the strip together
- Push the ring into the clay. Cover the object with a little
petroleum jelly. Press it into the clay, just enough so that it is
firmly in place.
- Pour a thin layer of plaster of Paris into the ring, just enough
to cover the object. Let it dry for a few hours. Drying time will
depend on how wet you made the mixture and the thickness of the
layer.
- Remove the ring and carefully separate the clay from the plaster
of Paris mold. Gently remove the object. Now you have a model
"mold" of the object.
- If desired, have the students paint their fossil with water-based
paint. Have them try to make it look realistic.
|