|
|
|
||
OBJECTIVES: · Discovering that water can be derived from air. · Experimenting with condensation, precipitation, sublimation, and evaporation. 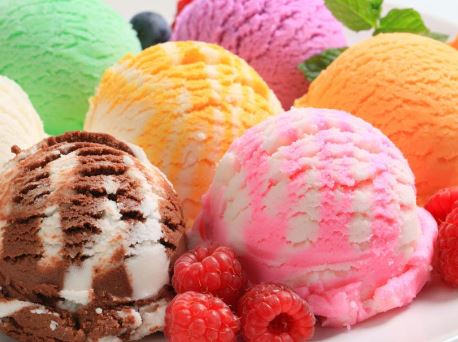 VOCABULARY:
MATERIALS:
ONLINE
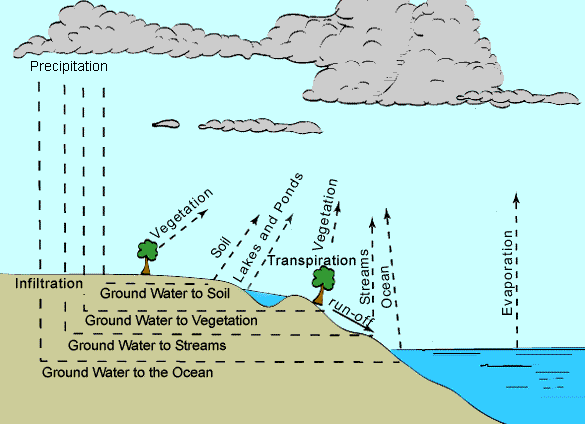
READINGS: https://www.msnucleus.org/membership/html/jh/earth/weather/lesson4/weather4a.html Water is a very versatile substance; it can be a solid, liquid, or gas. It has the ability to change into all these states of matter that make water ideal for making different types of weather. Children do not understand that water is a common component of air and can be "pulled" out. The amount of moisture, wind speed, topography, and temperature are important for the immediate weather. Pressure, wind direction, and movement of air masses are important to predict the weather. Water in the atmosphere moves around and causes all kinds of weather. The physical properties of water allow this compound to move easily from one state of matter to another. Rain is the liquid form. Snow, sleet, and hail are the solid form. Water vapor is the gaseous form.
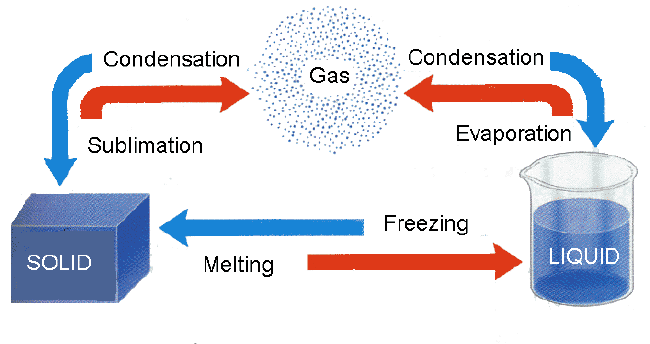
When a liquid is converted to gas, it is termed evaporation. Condensation is when vapor turns back to a liquid. Melting occurs when a solid is changed to a liquid, and freezing is the revere process. When a solid goes directly to a gas and vice versa, this is called sublimation.
Sublimation
is the transition of a substance directly from the solid to the gas phase
without passing through the intermediate liquid phase. An example of
sublimation is dry ice turning from a solid directly to a gas. The reverse of sublimation is deposition or desublimation. In desublimation a gas becomes a solid without going through the liquid phase. One example of deposition is frost where in sub-freezing air, water vapor changes directly to the solid form, ice, without first becoming a liquid. Condensation which is what this sweat on a glass is called, produces dew. Dew does not fall like rain. It is just water vapor that becomes liquid on a solid surface that has been cooled below a certain temperature. This cooling usually happens during a clear, cool night, but disappears once the morning Sun evaporates the dew. Frost is formed like dew, but at temperatures below freezing. The water vapor changes directly to small, fine frost crystals without condensing into water drop first. The dew point is the temperature at which the atmosphere is saturated with water vapor. A given volume of air containing higher amount of water vapor has a higher dew point than the same volume of drier air. The dew point gives an indication of the humidity. In meteorology the dew point is applied in the prediction of where and when clouds will form. In this lab the students will take a close look at what evaporation, condensation, and precipitation mean, by actually creating the different phases. These words are best defined by watching the phenomena. Otherwise, the terms mean very little. Although students live through weather system after system, they rarely observe what is actually occurring. PROCEDURE:1. Go over the Water Cycle and make sure
students understand the vocabulary words. 2. Read Snow Crystals and Flakes and discuss that snow is frozen vapor. Snow crystals can be the same, especially when they are small. However, snowflakes which are crystals that adhere are probably not ever the same. At the end of the poem you can see the pattern how snowflakes come from the clouds. The first time snowflakes were photographed were in the early 1920's by Wilson A. Bentley, known worldwide as the "Snowflake Man." 3. The lab helps the students understand condensation and precipitation. If you do these examples slowly, students will be able to see these phenomena occurring all around them, just by observing! Experiment 1. Experiment 2.
Frost is an example of deposition/desublimation.
A gas turning directly to a solid.
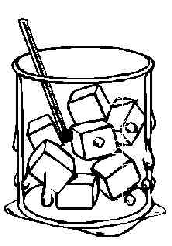
4. OPTIONAL ACTIVITY Making ice cream-- if you have time, takes
about 15 minutes. The next activity has the students making ice cream in a bag. It can help them understand how even things we eat use scientific principle. the chemistry of ice, salt and exothermic reactions 1/2 cup milk (heavy whipping cream is preferred) Mix the milk, vanilla and sugar together in one of the quart size bags. Seal tightly, allowing as little air to remain in the bag as possible. Too much air left inside may force the bag open during shaking. Place this bag inside the other quart size bag, again leaving as little air inside as possible and sealing well. By double-bagging, the risk of salt and ice leaking into the ice cream is minimized. Put the two bags inside the gallon size bag and fill the bag with ice, then sprinkle salt on top. Again let all the air escape and seal the bag. Wrap the bag in the towel or put your gloves on, and shake and massage the bag, making sure the ice surrounds the cream mixture. Five to eight minutes is adequate time for the mixture to freeze into ice cream. When salt comes into contact with ice, the freezing point of the ice is lowered. Water will normally freeze at 32 degrees F. A 10% salt solution freezes at 20 degrees F, and a 20% solution freezes at 2 degrees F. By lowering the temperature at which ice is frozen, we are able to create an environment in which the milk mixture can freeze at a temperature below 32 degrees F into ice cream. |
|||