BACKGROUND:
Wind can be defined as "moving
air." Windmills can be used for things like generating electricity or
grinding grain or pumping water. Winds push sailboats and windsurfers. The
main reason we study winds is because of their importance in weather.
Prevailing winds from the sea, like monsoons, carry rain, and winds from the
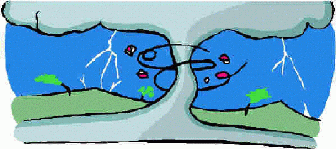
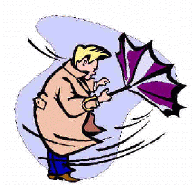
desert bring heat. Strong winds can cause a lot of damage. Large cyclonic
storms are called hurricanes in the Atlantic, typhoons in the Pacific,
cyclones around India and willy-willies in Australia.
Winds are normally described by speed and
direction. Wind speed may be described in miles per hour, which is measured
with an anemometer. Wind causes the arms to rotate, and their speed can be
measured.
Ancient people had many beliefs about the
winds. The ancient Greeks thought that the winds were the children of the sky
and the Earth. Unfortunately, the winds were very unruly, so Zeus decided that
they needed a dependable guardian. He chose Aeolus, who kept them in a hollow
cliff far out to sea. When one of the gods called for a wind, Aeolus would
punch a hole in the cliff wall with his spear. Then he plugged up the hole
until it was time for the wind to return. The North Wind was ice and wild. The
South Wind dripped water from his beard, and would spread fogs that the
sailors would get lost in Zephyr, the West Wind. Zephyr was gentle wind. He
would clear the sky of clouds and give beautiful weather.
PROCEDURE:
- Let the students help you define wind
when you introduce the subject. Go over the uses of wind, by showing pictures.
In the picture below, the wind is coming from the west. Describe a wind storm.
Discuss how to find the direction of the wind by wetting a finger and holding
it up or by watching the direction of a kite, pinwheel or bubbles.
|
WHERE IS THE WIND COMING FROM?
WEST
|
|
- Go outside with students and find the
wind direction with the students by using their fingers, with a wind vane,
with bubbles, and with pinwheels. Most students are not aware how to find out
where the wind is coming from. The name of the wind refers to the direction
its coming from. A west wind moves west to east. If you have an anemometer
show the students how it works. Students can make bubbles by using a straw and
put a little soapy water and blow softly. (You may want to do this exercise
after milk time, and have the students save their straws.) Have the students
observe which way the bubbles go. Discuss their results to see if they agree
on the wind direction.
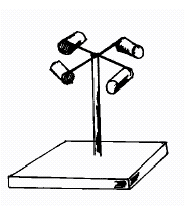
- You may want to make an
anemometer to show how you measure the speed of the wind. The directions below
are for an inexpensive way to show the basic principles. It is not
scientifically accurate.
ANEMOMETER
An anemometer measures the air speed by observing the
physical effects associated with air motion. The most common anemometer
utilizes the drifting of an object in air such as the rotating cup. The
rotating cup anemometer consists essentially of 3 or 4 cups, hemispherical or
bluntly conical, placed at the ends of light arms arranged like spokes of a
wheel around a rotating stick. The useful range of a standard cup anemometer
is about 5-100 mph. As the anemometer rotates in the wind, the number of
rotations can be mathematically calibrated to give the miles per hour of the
wind.
MATERIALS: 3 or 4 conical cups (ice cream
type), straws or thin strips of wood, post (wood or plastic), pins, nails,
hammer, glue
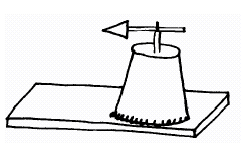
- You may want to make a wind vane
to show how easy it is to make.
WIND VANE
MATERIALS:
modeling clay, carton (large styrofoam cup), pencil with eraser, pin, straw,
card, sticky tape
- Make a hole in the middle of the bottom of the
carton and push the pencil into the hole.
- Fix the carton to the thick card with modeling clay.
- Cut two small triangles of thin card and fix one in each end of the
straw.
- Push the pin through the middle of the straw and into the eraser.
- Put the wind vane on a flat surface outside. Use a compass to mark north,
south, east, and west on the carton.
|