BACKGROUND:
Topographic maps represent and depict the surface of the land (3
dimensional) upon a 2 dimensional plane (the paper). According to the U.S.
Geological Survey, a topographical map is a line and symbol representation
of natural and selected man-made features of a part of the Earth's surface
plotted to a definite scale. A distinguishing characteristic of a
topographic map is its portrayal of the shape and elevation of the terrain
with contour lines. These are imaginary lines which connect all the points
at the same elevation on a map.
It is often hard for students to understand the connection between three
dimensional reality and a two dimensional map. In this exercise, students
make this link by creating a 3D model of Angel Island, California from a
simplified topographic map. This exercise can also be adapted to other
areas. It works well as long as adequate relief is present on the map.
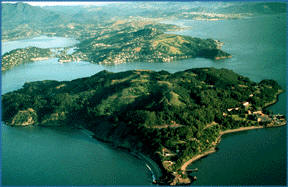
Angel Island is a small island in San Francisco Bay. It is northeast of
Alcatraz Island and the city of San Francisco. Angel Island was a U. S. Army
base for much of the 19th and the early 20th
centuries. For much of this time it was also the "Ellis Island of the
West", the immigration station for foreigners, mostly Asians, seeking
to live in the United States. It is currently a California State Park. More
information and pictures of Angel Island are available on the Internet at: http://www.angelisland.org/.
PROCEDURE:
- Explain contour intervals and topographic maps to the students, if
review is necessary. Make sure they can read and understand the
simplified Angel Island map included below. This map has a contour
interval of 100 feet.
- You can divide the class into groups of four students. One person will
cut the paper templates, another will roll the clay layers, the third
will mount and cut the layers, and fourth will assemble the model.
Starting with sea level, use scissors to cut a pattern for each
contour interval in the model. You will need patterns for sea level and
the 100, 200, 300, 400, 500, 600, and 700 foot contour intervals.
- Slightly wet the rolling pin, the utility board and the wooden sticks
with water. Place the two sticks on either side of the board, flat side
down, so that the rolling pin rides along them as if on tracks.
- Place the clay between the two sticks on the utility board. Roll the
pin back and forth over the clay until it rides firmly onto the two
wooden sticks. Make a clay "pancake" for each contour interval
levels. The Angel Island model requires eight pancakes.
- Lay the sea level pattern on top of one of the clay pancakes. Cut
around the edge of the template with your knife or point. This creates a
contour of Angel Island at sea level. Repeat with a new pancake and
pattern for the 100' contour interval. Repeat with each remaining
pattern and a new pancake.
- Stack the intervals in the same position as the original map. You now
have a step-wise model of the topography of Angel Island!
- If you wish to make a realistic model with natural slopes, smooth the
sides of the model to make them look like a real hillside.
|