BACKGROUND:
A crystalline solid is a material with an internal
atomic structure that is organized in a regular, repeating pattern. Some
solids are noncrystalline which are are termed "amorphous solids."
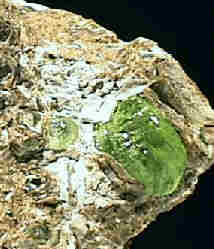
All native metals and minerals are crystalline, while glasses and plastics
are amorphous. A crystal is a single piece of crystalline matter that shows
the internal structure of a compound. Crystals can be composed of a wide
variety of elements. They thus have a wide variety of internal structures.
The concept of crystal structure is difficult for
young students. It is important to emphasize that the atomic structure
cannot be seen by the naked eye, but can be seen by scientists using
high-powered microscopes. However, the atom structure controls what the
crystal looks like, so when students look at mineral specimens, they can
make accurate observations about crystal structure.
PROCEDURE:
-
If desired, construct three-dimensional counterparts to the
two-dimensional structures that the students will create using the
geoboard. You may wish to create pyramids, squares, diamonds, and
rhombohedra.
-
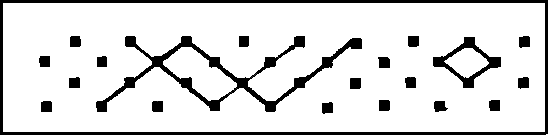
Using the geoboard, have the students make a repeating crystalline
pattern. The dots on the geoboard correspond to the internal arrangement
of atoms and molecules in the crystal. By connecting the dots, the
students will create analogues to crystal structures. For example, a
diamond-shaped pattern would create a mineral crystal that has
dipyramidal shape.
-
Using the worksheet, have the students create their own patterns. In
mathematical terms, these patterns would be called tessellations
(polygons that are repeated in a pattern.) The figure below shows a few
examples of patterns that the children can make.
-
Have students identify the shapes that they make with
Googolplex or Zometool. Emphasize that the shapes are two dimensional, but
that they correspond to three-dimensional structures. Compare them with
the three dimensional 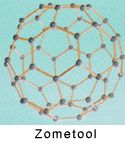 models. You may also want to point out different two
and three-dimensional shapes in the classroom. models. You may also want to point out different two
and three-dimensional shapes in the classroom.
-
After the
students have learned to identify the shapes, have them use Googolplex to
make 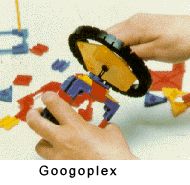 patterns. Students can use the connectors or not, depending on
their abilities. Have them place the pieces in different patterns
or repeatable arrangements. The number of possible patterns is infinite.
Many patterns can include more than one shape. patterns. Students can use the connectors or not, depending on
their abilities. Have them place the pieces in different patterns
or repeatable arrangements. The number of possible patterns is infinite.
Many patterns can include more than one shape.
You may want the students to draw their patterns after they assemble
them. You may want to have students share their patterns with classmates.
Ask them to connect the patterns with connectors before moving them. Have
them try to combine patterns. This will result in more complex designs.
|