BACKGROUND:
Plants are an important food source for animals.
Plants, like all other organisms, have developed unique strategies for
reproduction. Most plants produce seeds, which are plants waiting to
grow but which have the capacity to wait a long time before they begin
the growth cycle.
Seeds may be scattered by wind, water, animals, or
propulsion. Animals may spread seeds by a variety of ways such as by
eating hard seeds which pass through the animal's digestive system
unharmed or by picking up seeds on their coats and feathers. The
propulsion method results when the seed covering opens in such a way
that the seed shoots out. In many cases it is possible to look at a seed
and figure out which method is used. For instance, if a seed has
feathery extensions (like dandelions), then it can be sail through the
wind, looking for a suitable place to germinate (grow).
The first step in seed germination is the
absorption of water through a small opening called the micropyle. The
introduction of water through the pore causes the seed to swell. Placing
a bit of candle wax over the pore will demonstrate that the seed will
not swell when introduced into water. Many seeds will swell dramatically
as the water enters, and you will notice a sweet, almost fermenting odor
in the water after seeds have been soaked overnight (this is from enzyme
action).
Ferns reproduce through primitive
"seeds" called spores which are produced by the small pumps on
the back of older leaves. The dark brown, tiny spores are single cells
that will develop into plants if they land in the perfect environment.
Seeds are more likely to produce plants in environments that are less
than perfect. Spore producing plants produce tremendous numbers of
spores in order to have just a few develop into plants.
PROCEDURE:
The protective seed coat, food storage area and
partially developed plant can all be seen reasonably well in a pea,
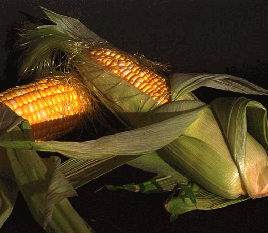
bean, or peanut. A corn seed is constructed differently and should be
discussed to illustrate that not all seeds are the same.
- Instruct students to color the roots brown,
food storage yellow, and leaves green on the worksheet (this will help
when you discuss each of the pictures.
- If you have different types of fruit, you may
want the students to try and observe where the seed is located.
Look at the "Fruit and Seed Classification" chart and guide students
observation of where the seeds are located. You may want to
give them the names to help students see the difference of where the
seeds are located.
- Instruct students to look at the bean seed. The
first step in seed germination is the absorption of water through a
small opening called the micropyle (hole that water penetrates the seed
through). If you have bean seeds available show your students where this
hole is located. Explain that the rest of the bean functions as food
storage to help the seed make a leaf, which in turn will produce its own
food.
- You may want to put the beans in water and have
the students observe that the bean actually gets larger because of the
water entering through the micropyle
- Show the students a corn seed. Note that the
shape of the corn seed is different from the other seeds. The water is
absorbed near the root area of the seed.
- The fern is very different because its
seeds are not exactly like the corn and bean seeds. Ferns produce
spores on the back of the plant.