|
|
Applied Science
- Technology (6A) |
|
|
|
Applied Science
- Technology (6A) |
|
DIRECTIONS FOR CONSTRUCTING GLIDERS
| Glider 1. Use a 10 x 15 cm piece of stiff paper. Fold the paper lengthwise down the middle. Then draw the glider design as shown. After you draw the design, keep the paper folded while you cut away the shaded areas with a pair of scissors. Now cut down about two thirds of the way as shown in the drawing. Make this cut while the paper is still folded so the two wings will be of equal size. Fold each wing downwards and crease it. Now slip a small paper clip over the nose of the glider so it holds both sides together. With the paper clip firmly in place, make sure the wings stand out horizontally from the body of the glider. |
|
|
|
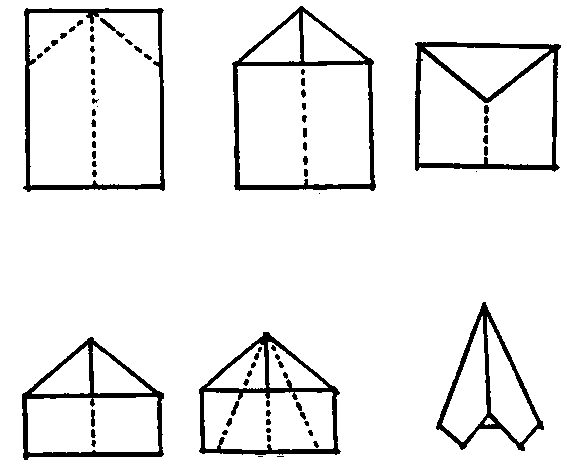
Glider 2. Use a piece of paper fold it lengthwise down the middle then unfold it. Now fold the two upper corners towards the center and crease them into place as in the diagram. Next fold point A toward the middle and crease it firmly. Do the same for point B. Refold your glider along the middle crease and place it on its side as shown in diagram. Fold the top side so it reaches the bottom. Crease it firmly. Turn the glider over and do the same with the other side. Now that you have constructed the glider's wings, its ready to fly. |
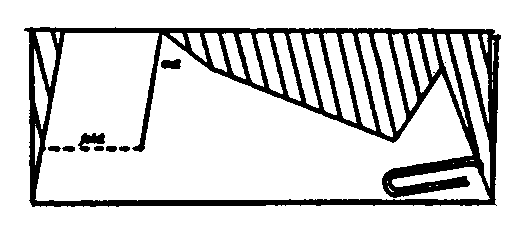
| Glider 3. Fold lengthwise a stiff paper (file card) that is 10 x 15 cm. Use the glider 3 model and copy the glider. Cut out the glider with the paper still folded. Fold the dashed lines at A, B, and C. Fold A outwards, B inwards, and C outwards as in the figure. Place two paper clips at point D on the gliders nose as in diagram. Put one clip on either side. Do not clip the two sides together. The body of the glider should remain open. Give the darter a quick toss and off it goes. |
|
|
|
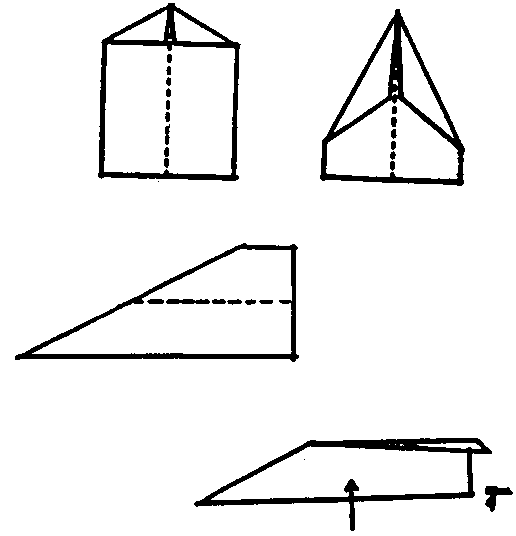
Glider 4.
Fold paper lengthwise down the middle. Crease it then flatten the
paper out as in the diagram. Use the middle fold for a guide line. Now
fold the two upper corners towards the middle and crease them. Fold
the triangular paper of the paper toward you. Next fold the top right
corner towards the center line and crease it. Do the same with the top
left corner.
Make the two folds at the dotted lines as show in diagram. The completed glider should look like the last diagram. |
|
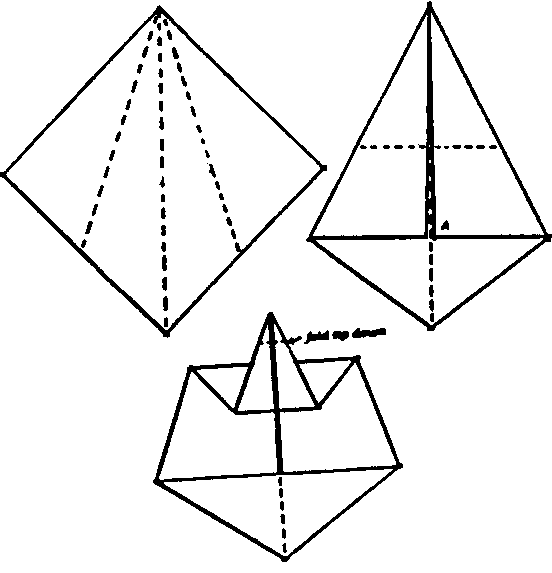
Glider 5. This glider flies in one loop and comes back to the same place. Start with a 20 cm square of paper. Fold it in half diagonally as show in the diagram. Crease the paper and unfold it. Then make the two side folds as indicated. Crease these folds and do not unfold the glider as in the diagram. Fold the tail down and make the point of the tail extend about 2.5 cm past point A. Next fold the tail upwards so the tip of it extends about a 3 cm above the body of the glider. Now fold the tip of the tail downwards about 1 cm. Fold the glider in half and put the bottom flap down. |
|